To add bullet points in Google Docs, open your document and position the cursor where you want them. Click the “Bullets” icon in the toolbar (three dots), and your text will be formatted into a bulleted list. This simple feature enhances document readability and organisation.
How To Add Bullet Points In Google Docs? Easy! Start by opening your document and placing the cursor where you want the bullets. Click the “Bullets” icon (three dots) in the toolbar, and watch your text transform into a tidy list. This straightforward feature is a game-changer for organisation and readability. Give it a try to make your documents more visually appealing and user-friendly!
Adding bullet points in Google Docs is a breeze. Start by opening your document and positioning the cursor where you want the bullets. Click on the “Bullets” icon in the toolbar (three dots), and instantly, your text transforms into a neatly formatted list. This feature is a handy tool for organizing information and improving readability. To remove the bullet points, simply click the icon again.
Adding Bullet Points In Google Docs
- Open your Google Docs Document:
Go to Google Docs and open the document where you want to add bullet points.
- Place your cursor:
Click on the location in the document where you want to start your list.
- Insert a Bulleted List:
Use one of the following methods:
Press the Ctrl + Shift + 8 (Windows/Linux) or Command + Shift + 8 (Mac) keyboard shortcut.
Click on the “Format” menu at the top of Google Docs, then select “Bullets.”
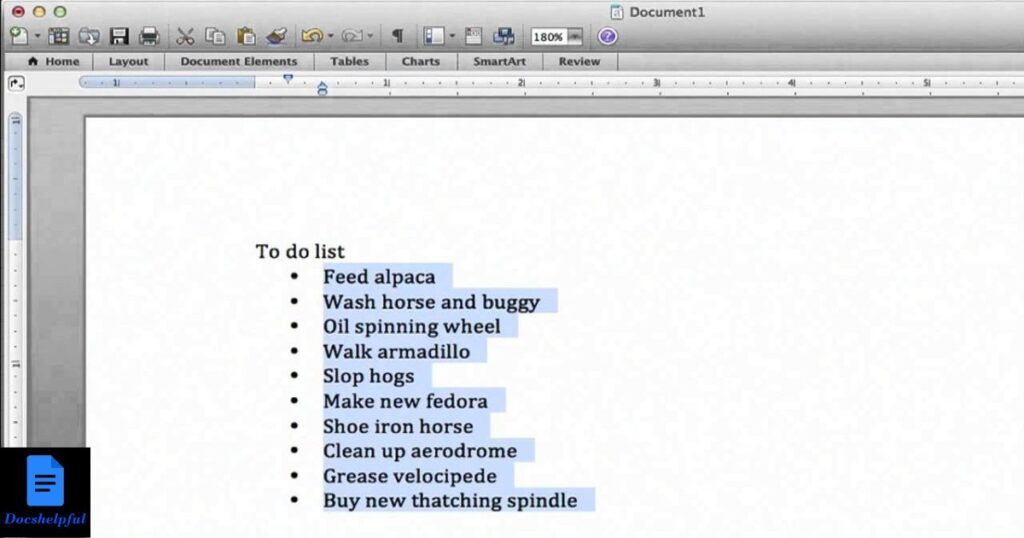
- Start Typing:
Once you’ve added the bullet point, start typing your text. Press Enter to create a new bullet point.
- Customizing Bullet Points (Optional):
To customize the bullet points, you can click on the “Bullets” icon in the toolbar to choose different bullet styles or change the indentation.
- Creating Nested Bullet Points (Optional):
To create a nested bullet point (a sublist), press Tab on your keyboard after creating a bullet point. To go back to the main level, press Shift + Tab.
- Remove Bullet Points:
To remove bullet points, place your cursor at the beginning of the line with the bullet point and press Backspace until the bullet point is gone.
How to Create a Bulleted List?
| Step | Instructions |
| 1 | Open Google Docs and create a new document or open an existing one. |
| 2 | Place your cursor where you want to start the bulleted list. |
| 3 | Click on the “Bulleted list” icon in the toolbar. It looks like a bulleted list with dots. Alternatively, use the keyboard shortcut: Ctrl + Shift + 8 (Cmd + Shift + 8 on Mac). |
| 4 | Start typing your first item and press “Enter” to create a new bullet point. |
| 5 | To create a sub-item, press “Tab” before typing. To go back to a higher level, press “Shift + Tab.” |
| 6 | Continue adding items to your bulleted list by pressing “Enter” after each item. |
| 7 | To end the bulleted list, press “Enter” twice after the last item or click the “Bulleted list” icon again. |
| 8 | Customize your bulleted list by selecting the list and using the toolbar options for formatting, such as changing the bullet style, indenting, or changing text color. |
What is the keyboard shortcut for bullets in Google Docs?
implementing bullet points is a swift and efficient process that enhances document organization and readability. To swiftly insert bullet points into your text, the keyboard shortcut is a valuable tool. By simply pressing the keyboard combination of “Ctrl” + “.”, or “Cmd” + “.” on a Mac, users can effortlessly create bullet points in their Google Docs. This shortcut streamlines the document creation process, allowing users to focus on content without navigating through menus or toolbars. Harnessing this keyboard shortcut not only expedites the incorporation of bulleted lists but also promotes a seamless and user-friendly experience within the Google Docs platform.
In the realm of collaborative document editing and content structuring, mastering the keyboard shortcut for bullet points in Google Docs becomes a proficiency that significantly elevates productivity. The seamless integration of bullet points within a document is pivotal for conveying information in a clear and organized manner.
By incorporating the keyboard shortcut into one’s workflow, users can effortlessly punctuate their content with these visual aids, fostering a more engaging and comprehensible reading experience. This shortcut stands as a testament to Google Docs’ commitment to user-friendly functionality, providing a quick and intuitive solution for the ubiquitous need for bullet points in document creation.
How do you add bullet points?
Adding bullet points in a document or text is a straightforward process and can enhance readability and organization. In most word processing software, such as Microsoft Word or Google Docs, you can easily incorporate bullet points by selecting the desired text and clicking on the bullet point icon in the toolbar.
Alternatively, you can use keyboard shortcuts like “Ctrl + Shift + L” in Microsoft Word or “Cmd + Shift + 8” on a Mac to quickly add bullet points. Once applied, the text will be formatted with distinct bullet points, providing a clear visual indication of each item or point. Bullet points are commonly used in lists, summaries, or presentations to break down information into manageable chunks, making it easier for readers to follow and absorb key details.
Moreover, different styles and types of bullet points are often available to customise the appearance of your lists. This customization can include changing the shape of the bullet, adjusting the indentation, or altering the colour to suit the overall design of the document. Utilising bullet points effectively not only improves the visual appeal of your content but also helps in emphasising important information, facilitating better communication and comprehension for your audience.
How to do 2 bullet points on the same line in Google Docs?
- Manually Adjust Indentation:
- Start by adding a bullet point to the beginning of the line using the toolbar or by typing an asterisk (*) followed by a space.
- Type the content of the first bullet point.
- Press the Tab key on your keyboard to manually adjust the indentation. This will bring the cursor to the position where the second bullet point should start.
- Type the content of the second bullet point.
- Use a Table with One Row:
- Create a one-row table by going to the “Insert” menu, selecting “Table,” and choosing a table with one row.
- Place the cursor in the first cell of the table and add a bullet point followed by a space.
- Type the content of the first bullet point.
- Move to the next cell within the same row by pressing the Tab key.
- Add another bullet point followed by a space and type the content of the second bullet point.
How to do a bullet point on a keyboard?
Creating bullet points on a keyboard is a straightforward process that enhances the readability and organization of lists in documents. To begin, ensure that you are in a text editing program such as Microsoft Word or Google Docs. Position the cursor at the beginning of the line where you want to add a bullet point.
On most keyboards, you can insert a bullet point by holding down the “Alt” key and simultaneously typing “0149” on the numeric keypad. If your keyboard lacks a numeric keypad, you can use the dedicated bullet point shortcut, which involves holding down the “Alt” key and pressing “7” on the numeric row. Alternatively, some word processing software, like Microsoft Word, automatically converts asterisks (*) or hyphens (-) followed by a space into bullet points when you press the “Enter” key.
Additionally, many modern text editors, including web-based platforms like Google Docs, provide a simple shortcut to create bullet points. Once you are in a list, pressing the “Tab” key at the beginning of a new line often converts it into a bullet point. If you want to remove a bullet point, pressing “Shift + Tab” or “Backspace” at the start of the line usually does the trick. By mastering these keyboard shortcuts, you can efficiently incorporate bullet points into your documents, improving their visual appeal and organizational structure.
FAQs
How do I add bullet points in Google Docs?
- Click the “Bulleted list” icon or use “Ctrl + Shift + 8” (Windows) or “Command + Shift + 8” (Mac).
Can I customize bullet point appearance?
- Yes, click the drop-down arrow by the “Bulleted list” icon to choose styles or use custom images.
How to create a numbered list?
- Click the “Numbered list” icon or use “Ctrl + Shift + 7” (Windows) or “Command + Shift + 7” (Mac).
Can I adjust bullet point indentation?
- Yes, use toolbar icons or shortcuts like “Ctrl + ]” to increase and “Ctrl + [” to decrease indentation (Windows).
Is adding sub-bullet points possible?
- Yes, press “Tab” for sub-bullets and “Shift + Tab” to return to the main level.
Conclusion
mastering the art of adding bullet points in Google Docs proves to be a valuable skill that enhances document readability and organization. The straightforward process outlined above empowers users to effortlessly create bulleted lists, facilitating the effective communication of information in a visually appealing manner. By incorporating bullet points, writers can break down complex ideas, emphasize key points, and maintain a structured flow within their documents. Google Docs’ user-friendly interface, coupled with its diverse formatting options, ensures that users can easily customize their bullet points to suit their specific document requirements, fostering clarity and coherence.
Furthermore, the ability to add bullet points efficiently in Google Docs showcases the platform’s commitment to providing a seamless and intuitive user experience. As a widely used collaborative tool, Google Docs not only simplifies the process of document creation but also encourages effective collaboration among users. Whether working on a project, drafting a report, or creating educational materials, the incorporation of bullet points proves to be an essential feature that significantly enhances the overall quality and visual appeal of documents, contributing to a more engaging and comprehensible reading experience.
click on this link go to next article “How To Print A Google Docs With Comments?“

Alexander Wren, a seasoned author with 8 years of expertise, excels in document assistance. His domain “docs help ful” showcases a legacy of user-friendly content, blending creativity and precision to simplify complexity.